Jekyll with VSTS and Azure
I've been a big fan of the Jekyll website generator for a few years now. I use it for all my websites, and I've recently perfected my build pipeline from GitHub to Azure using Visual Studio Team Services. In particular, I use Jekyll with VSTS and Azure for the website for my podcast, All Things Git, and even after a few months, I couldn't be happier with this setup.
If you're not familiar with Jekyll, it's a simple tool that takes a site as Markdown and processes it into HTML. It's a great way to create a site and it's a much, much simpler blog platform than something like WordPress.
One of the most popular Jekyll installations is on GitHub Pages, where it's easy to set up your site in a Git repository, push it and have it published to your GitHub Pages site. This is perfect for open source projects without too many custom requirements. For example, we use GitHub pages for hosting the website for libgit2, the open source project.
But if you need to scale up, it's easy to deploy Jekyll sites to Azure, and use VSTS to manage the deployment.
GitHub Pages is great for simple, static sites. We use it for the libgit2 site, for example. But many sites need some additional customization beyond what GitHub Pages offers. For example: you might want to enable search on your Jekyll blog using the lunr.js plugin. Or you might want to create an approval pipeline — adding a staging server so that you can review changes before moving them to production.
You can also set up a site with custom networking or execution requirements. All Things Git uses Azure CDN so that we can serve the episode audio efficiently. We also add custom executables and filters running within the web application, so that we can do things like configuring a custom Google Analytics setup. This lets us support Analytics for non-HTML files on the site (like our audio).
Obviously, GitHub Pages don't allow you to run arbitrary code, since it's a shared service, so hosting ourselves on a provider like Azure is our only option.
VSTS has an incredibly flexible CI/CD system that supports a variety of platforms. It offers hosted build agents, in Azure, for Windows (of course), Linux and even macOS. But none of these agents have Jekyll installed out of the box. So our first step could be to install Jekyll.
But you know what's easier than installing Jekyll? Not installing it. Since Jekyll ships a docker image, we can simply run that for our build.
So our build steps are:
- Run a
jekyll buildin thejekyll/builderdocker image. This will take our site, process it, and spit it the rendered site. - Zip up jekyll's output, the results of the rendering.
- Publish that zip as a build artifact; we can download this to inspect it, or use the zip in a deployment.
VSTS has a YAML-based build system as well as a graphical designer. I prefer the YAML — using a file to configure your builds ties the build process strongly to the code, an idea called "configuration as code". Checking the build process in ensures that the build steps are accurate for every version being built, even as you check out historical versions or change branches.
You can add the YAML directly to the repository, creating a .vsts-ci.yml
in the root of your project:
resources:
- repo: self

steps:
- task: Docker@0
  displayName: Run Jekyll
  inputs:
    action: 'Run an image'
    imageName: 'jekyll/builder:latest'
    volumes: |
     $(Build.SourcesDirectory):/srv/jekyll
     $(Build.BinariesDirectory):/srv/jekyll/_site
    containerCommand: 'jekyll build --future'
    detached: false

- task: ArchiveFiles@1
  displayName: Archive Files
  inputs:
    includeRootFolder: false

- task: PublishBuildArtifacts@1
  displayName: Publish Site
  inputs:
    PathtoPublish: '$(Build.ArtifactStagingDirectory)/$(Build.BuildId).zip'
    ArtifactName: www
In Visual Studio Team Services, navigate to the 🚀 Build and Release area of your project, and click "+ New" to create a new build definition.
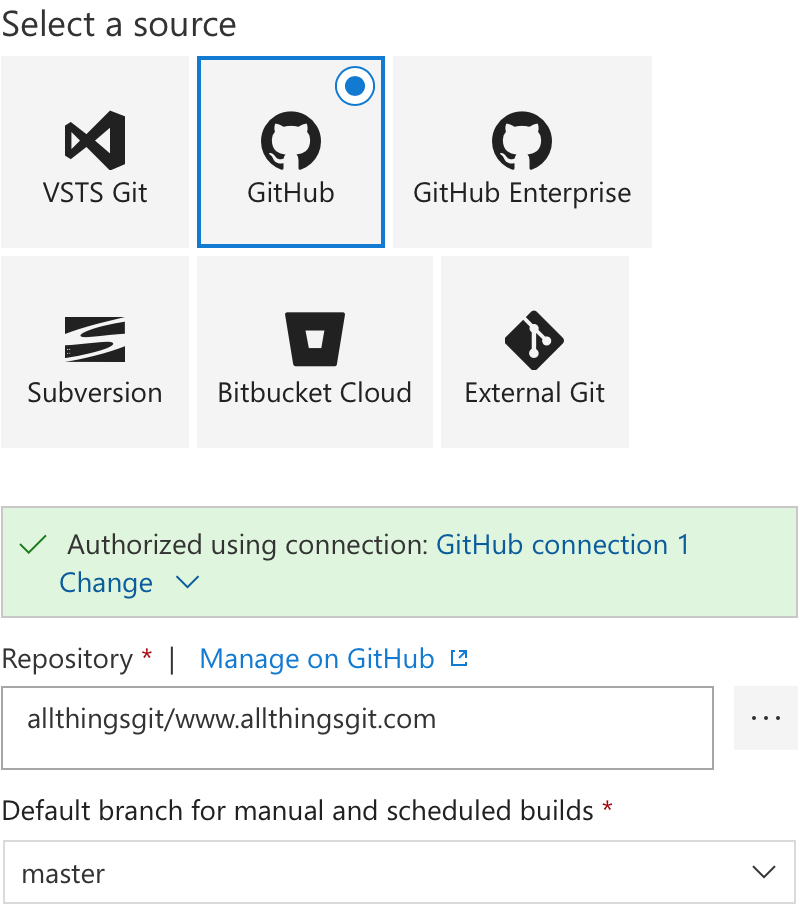
If you're using a Git repository hosted in VSTS, you can just select it; for GitHub or a locally-hosted GitHub Enterprise instance, you'll need to authenticate, then you can select the repository that contains your Jekyll site.
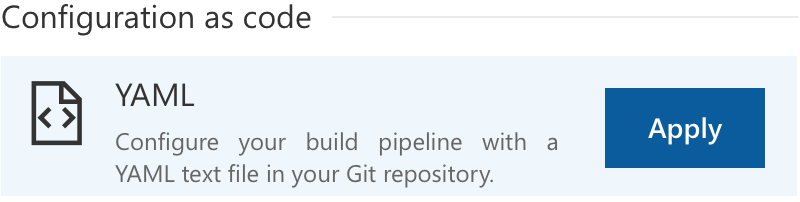
When you click continue, you'll be prompted to select a build template. VSTS supports a variety of platforms and have templates for many configurations out of the box. But we recommend using configuration as code with YAML files. Since we set that up in the last step, select the YAML option and click Apply.
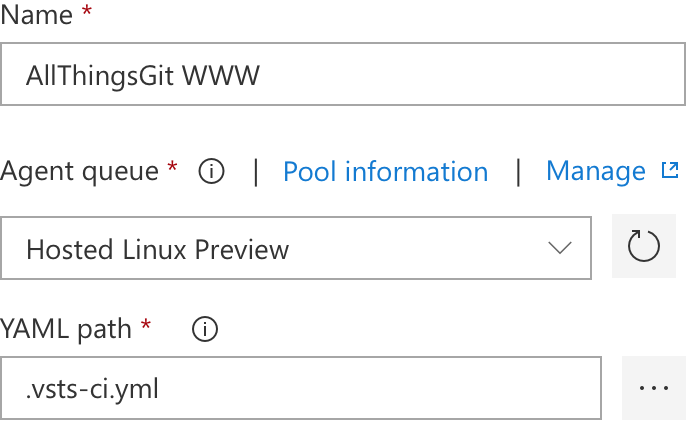
Finally, in the build definition configuration, set up your process. Give
your build definition a name, set the agent queue to the "Hosted Linux
Preview" queue (since our docker image is a Linux image) and set the YAML
path to .vsts-ci.yml, which we created in the previous step. (You can
simply click the ... button to browse your repository.
And that's it - this will set up a CI pipeline so that when you push into master, or merge a pull request, Jekyll will build out your site and package it into a zip file.
Once you've got your website built and packaged, you can deploy it to your web application. Navigate to the 🚀 Releases area of your project, and click "Create a release pipeline". You'll be prompted to select a template - the easiest to start with is the Azure App Service deployment template.

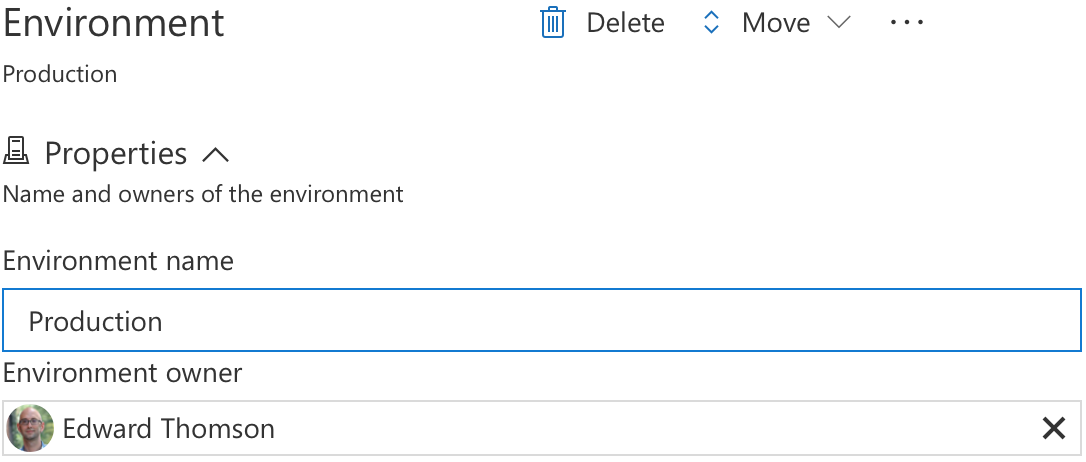
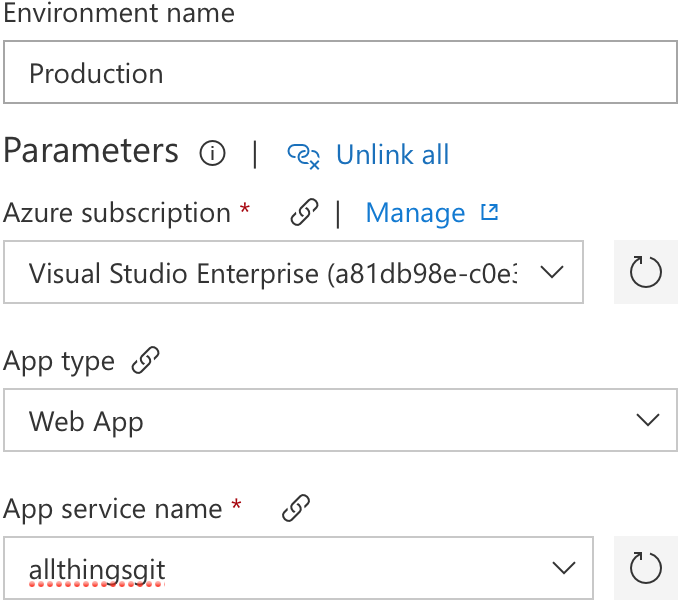
You'll immediately be prompted to configure the deployment environment. All you need to do is give it a name - I call mine "Production":
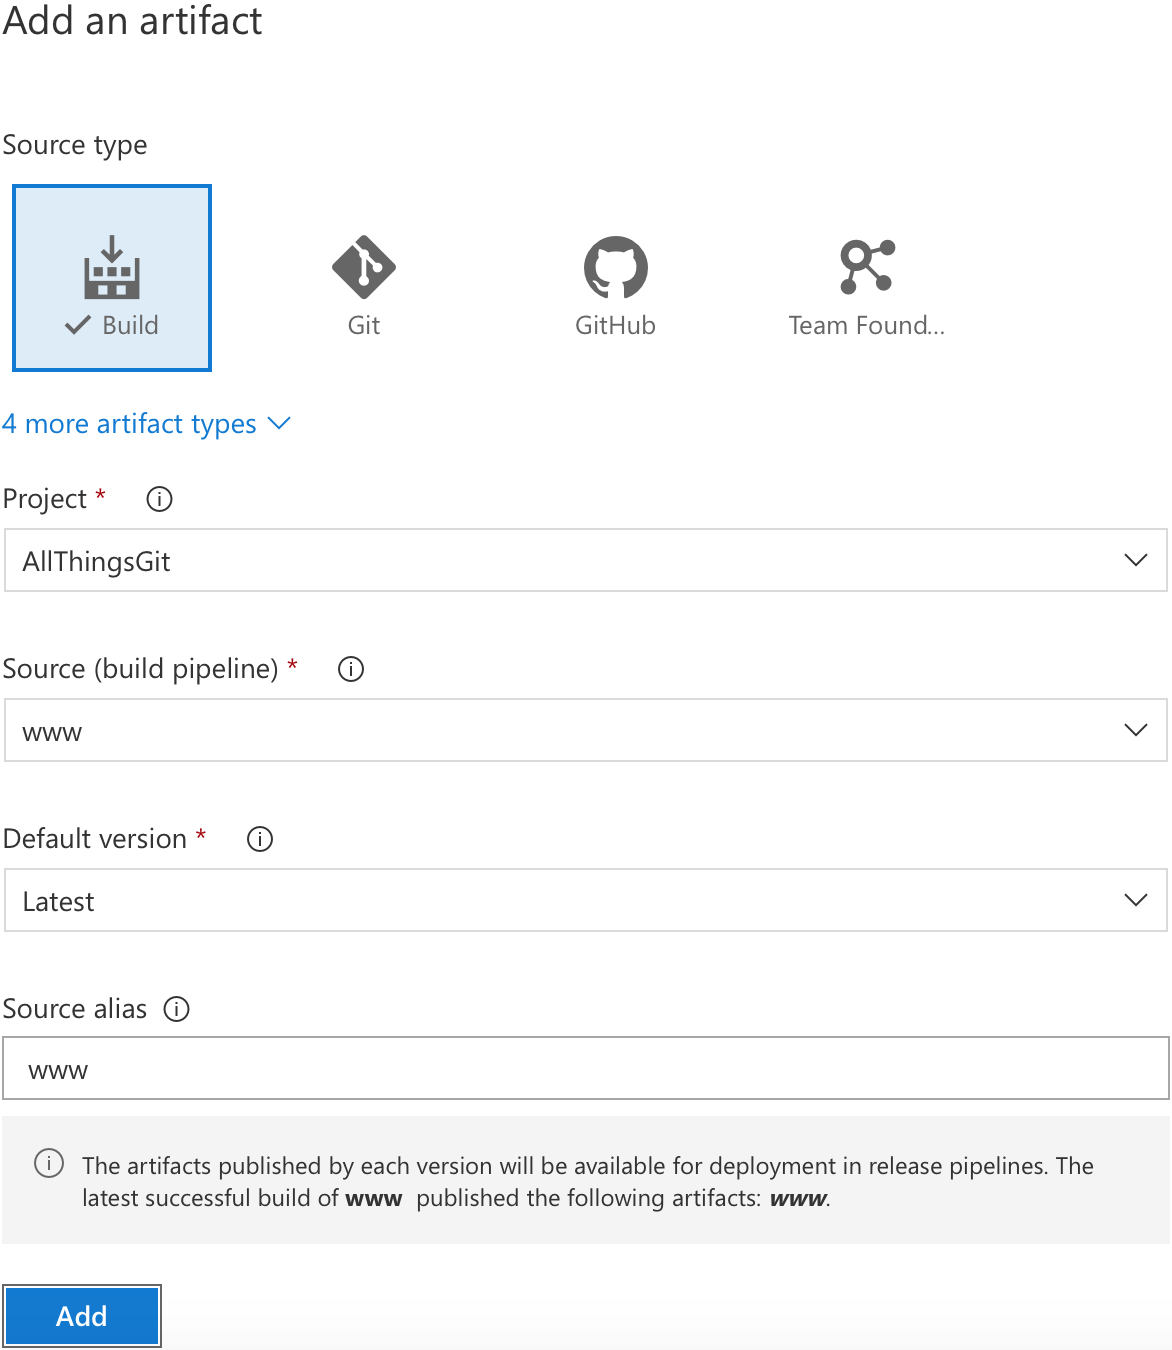
In the Artifacts tab on the left, click "Add an Artifact", then select the build artifact you created in the previous step and click "Add".
Once the artifact is configured, click the ⚡️ lightning bolt above the artifact to configure the Continuous deployment trigger. In the pane that opens, turn the continuous deployment trigger option to enabled. This will let you set up a deployment every time your build completes.

Finally, you need to configure the app service to deploy to. You need to have already created a web app in the Azure portal. And you can do that on one of the budget plans — for a static web site you probably don't need much larger than the Shared plan. You could even get by with the Free plan if you don't want a custom domain.
All you have to do is select your Azure subscription (click "Manage" if you haven't connected your VSTS account and your Azure account), and then select the App service that you want to deploy to.
Finally, give your pipeline a name. Hover over "New release pipeline" at the top of the page, and select the ✏️ to edit it.

Finally, click 💾 Save and your pipeline is configured.
That's it! Now you have a full CI/CD pipeline for your static web site, powered by Jekyll, VSTS and Azure.
When you push a change to the master branch, or when you merge a pull request into master, VSTS will start a Jekyll build on one of its Linux build agents, hosted in Azure. When you merge a pull request into master, the results will be packaged up, then deployed to your Azure web app. It's an incredibly easy process that gives you a flexible and powerful pipeline for your website.