Creating Mac Disk Images (DMG) with VSTS Build Agents
I like to pretend that for most of my career, I've only worked on Unix platforms. But that's not exactly true; in fact, I've spent most of my time building cross-platform applications. But I pretend because writing cross-platform applications is hard. And writing cross-platform UI applications is especially hard. So it's exciting to be able to use Electron to be able to easily create cross-platform UI.
I've started working on an Electron app, and even though it's not done yet, and definitely not ready to release, one of the things that I've been thinking about is packaging it for distribution.
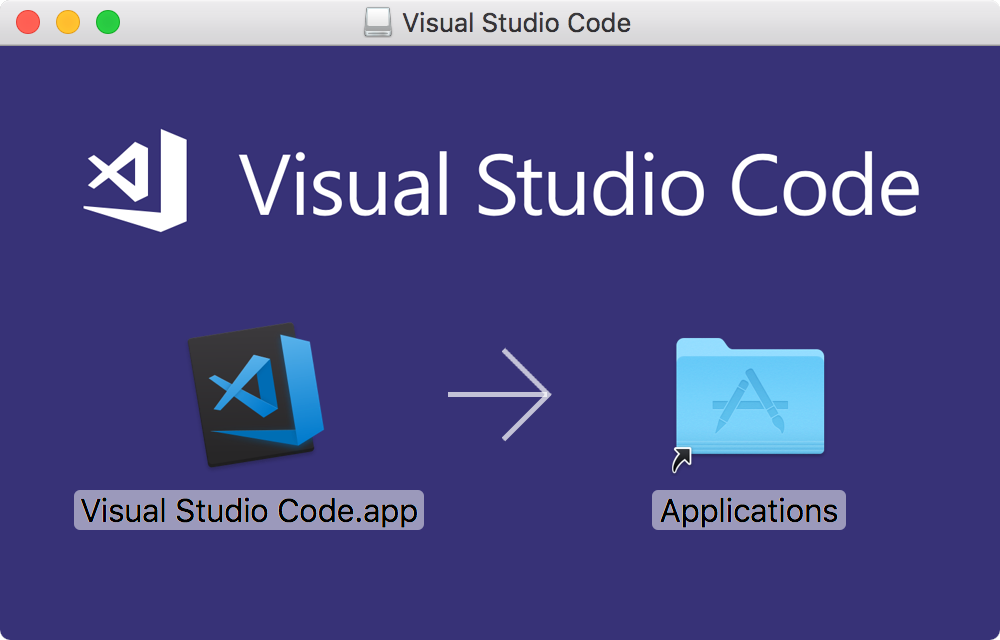
Most Electron apps are bundled as ZIP archives, and maybe tarballs on
Linux. And that's fine but a really cool user experience is to provide
a disk image for macOS. Instead of just a zipped up .app folder, this
lets you add some branding, and lets you add a link to the Applications
folder so that you can just drag and drop:
One of the problems with creating a DMG, though, is that you need a Mac to do it. You can't easily create DMGs on a Linux box or a Windows VM. You need a proper Mac, and historically, it's been hard to find Macs in the cloud for CI hosts.
This was especially problematic if you needed to build any native code. You'd need Windows, Linux and Mac hosts in order to target all your platforms and, until recently, no CI system offered hosted build environments for all the platforms.
But now, Visual Studio Team Services offers hosted Windows, Linux and Mac systems for continuous integration build hosts. And they're free to get started with.
This means that you can use the macOS build hosts to package up your .app
into a nicely branded disk image.
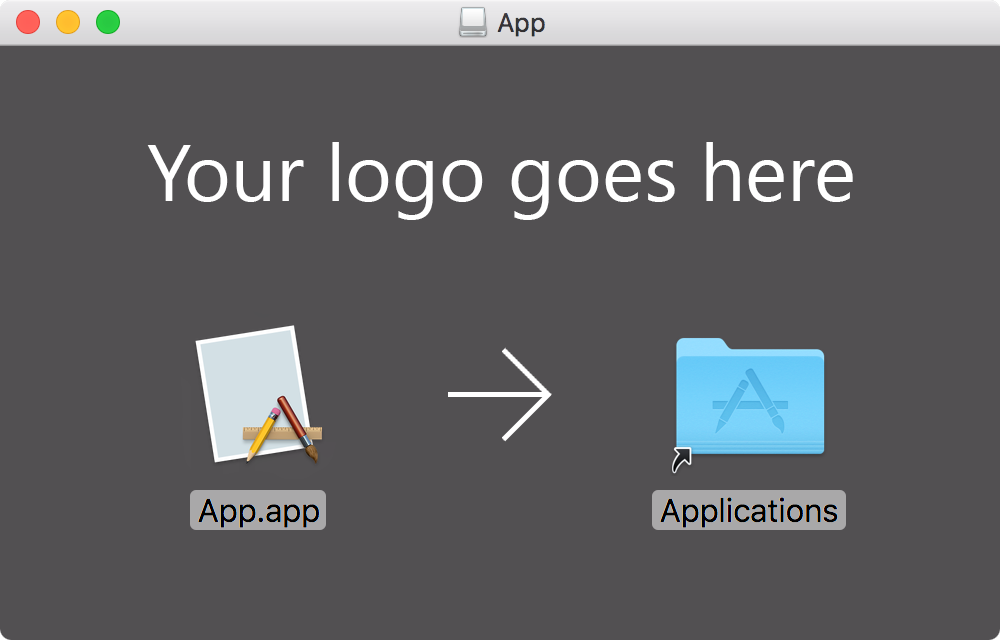
One of the great things about using a DMG is that you can create a custom
background for the disk image. You can add your logo and provide some simple
instructions that people should drag and drop your app into the Applications
folder.
If you're using Photoshop, make sure you set it up as a high DPI image. Here, I want a window size of 500x300, so I'm creating an image that is 1000x600 at 144dpi. If you do this, make sure you use the Save File dialog and select a PNG; the quick export functionality will save as 72dpi.
Create a Git repository that contains the necessary bits to generate a DMG with all the artwork. You'll need to create a new repository that includes:
-
The background image that you created for you app.
-
The create-dmg program written by Andrey Tarantsov.
You can check this in directly, but I set this up as a submodule; the build step in VSTS can fetch submodules, even if they're hosted in other services. So you can have your proprietary software hosted in VSTS and it can reference Open Source submodules hosted in GitHub.
-
A shell script to execute
create-dmgwith all the appropriate arguments. The exact icon placement dimensions will depend on the size of your background and its layout. I named minebuild.sh; an example shell script forApp.app(using example DMG background, above) might look like:#!/bin/sh create-dmg/create-dmg \ --volname "App" \ --background "background.png" \ --window-pos 200 120 \ --window-size 500 320 \ --icon-size 80 \ --icon "App.app" 125 175 \ --hide-extension "App.app" \ --app-drop-link 375 175 \ "App.dmg" \ "App.app"(Remember to set your shell script executable.)
It's easy to set up a build pipeline for a hosted Mac build agent. In your Visual Studio Team Services account, navigate to the Build page, and select New Definition.
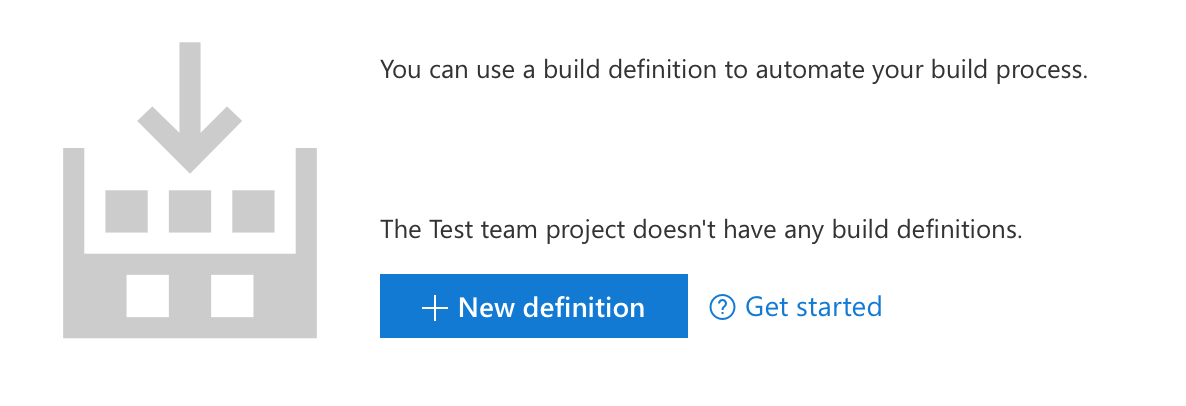
VSTS offers helpful build templates to get you started, but we're just running a shell script, so select empty process.
-
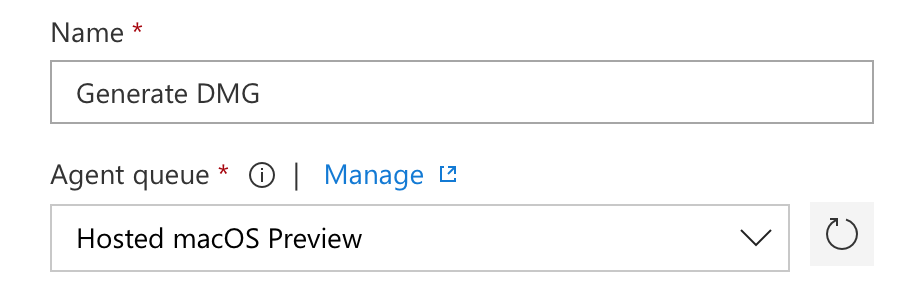
In the "Process" tab, give it a name like Generate DMG, and set the agent queue to Hosted macOS Preview.
-
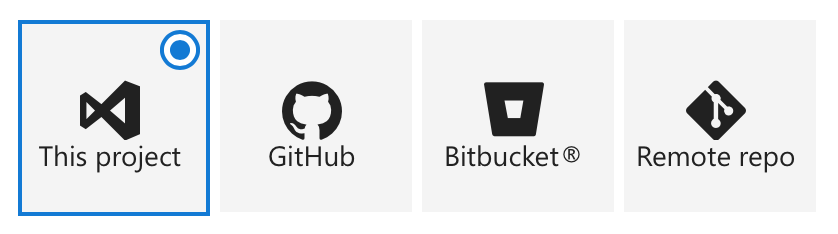
In the "Get sources" tab, select where you've hosted the Git repository that contains your build script. Mine is - of course - hosted in a Git repository in Visual Studio Team Services, but the VSTS build process can build repositories that are hosted anywhere.
If you added
create-dmgas a submodule, then make sure to show "Advanced settings" and check the "Checkout submodules" option.
-
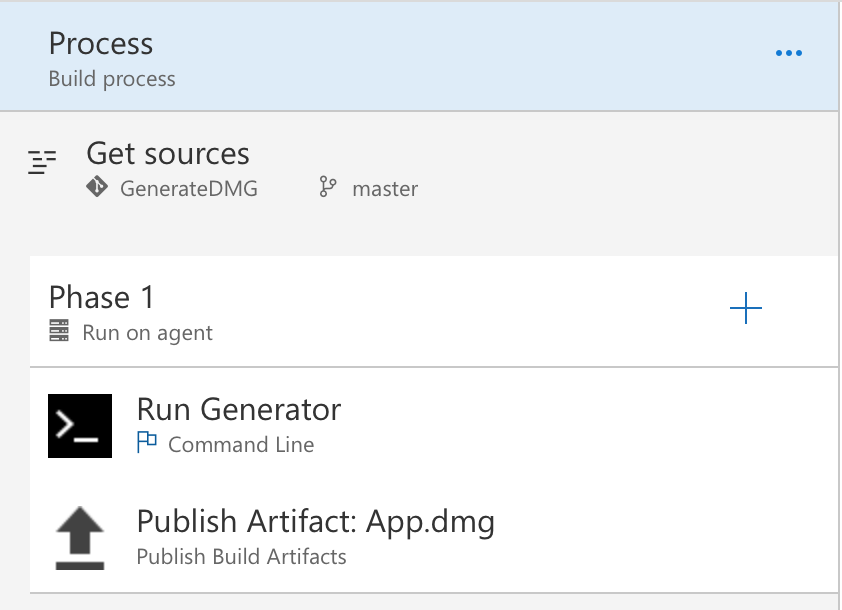
Click the
+button on build phase to add a new build task to Phase 1. In the task selection list, scroll or search for the "Command Line" task and click "Add".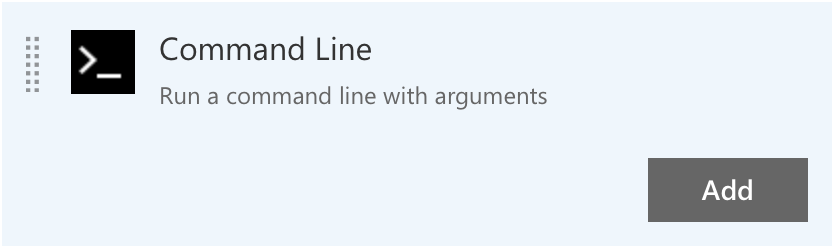
Select the new task, and give it a display name like "Run Generator". In the "Tool" option, enter "
/bin/sh", since we wrote a shell script. Finally, in "Arguments", enter the name of your shell script, "build.sh".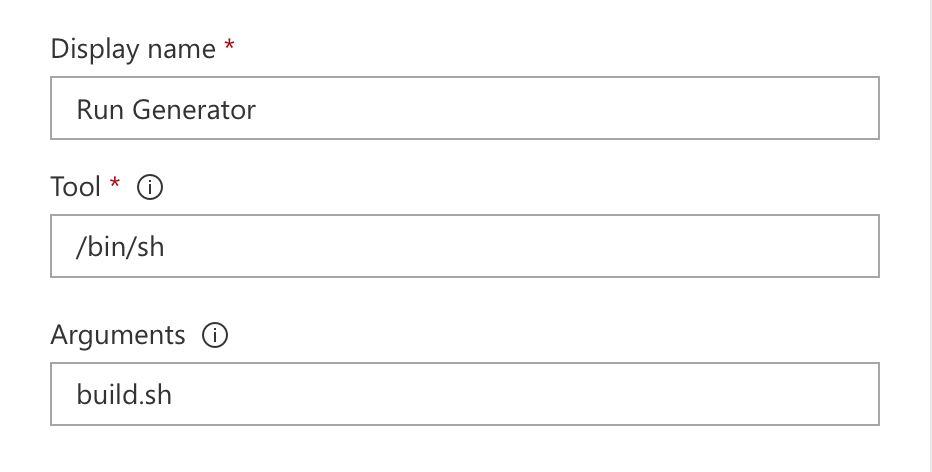
-
Click the
+button on the build phase to add another build task. In the task selection list, scroll or search for the "Publish Build Artifacts" task and click "Add".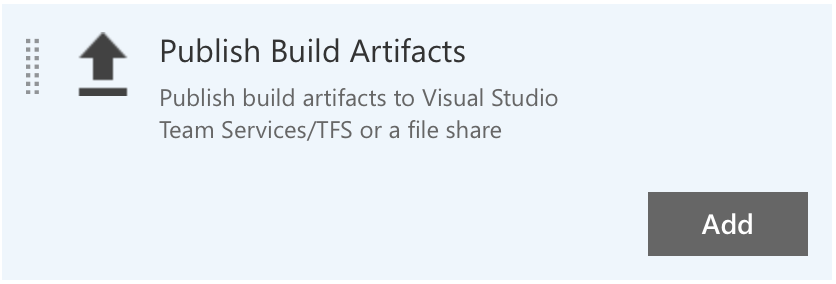
This task will add the resultant DMG as a build artifact that we can download or deploy.
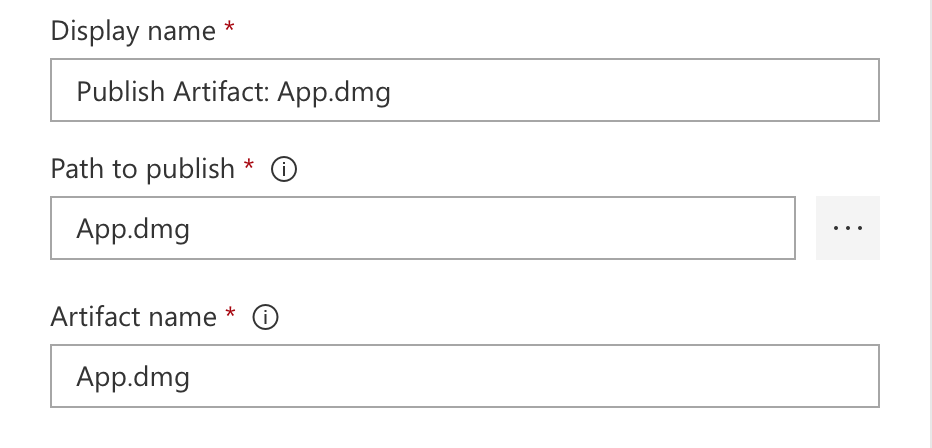
In the "Path to publish" option, enter the name of the DMG that your build script generated. In my example, this is "
App.dmg".Finally, in the "Artifact name" option, enter the name you want to save this artifact as; this is what you'll download or deploy. I recommend using the name of your DMG here.
And that's all - it's just a few simple steps to create a DMG.
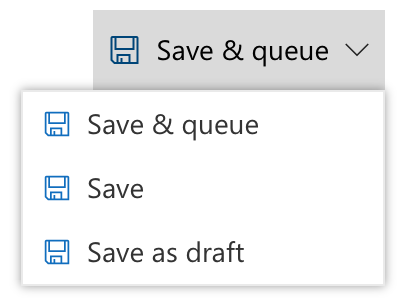
Once you've configured your build, you can select "Save & queue" at the top of the page to save your build definition and queue the build to create a DMG.
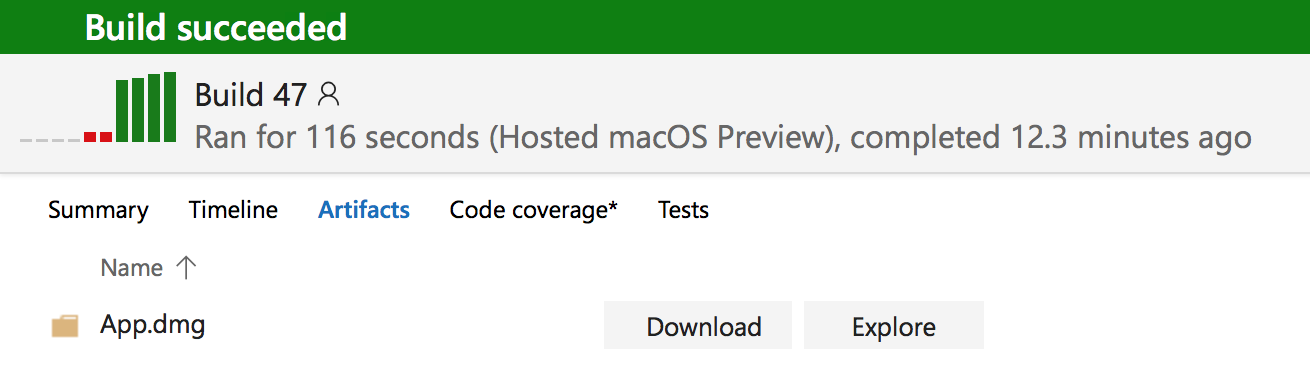
When you do, you'll get a notification that your build has been queued. You can select the build number to follow a link to that build.

And once the build completes successfully, you'll be able to navigate to the "Artifacts" tab and download your DMG.
Obviously you could - and should - also deploy this to a download site automatically, creating a deployment pipeline in VSTS.
I created a build script that will download the latest version of Visual Studio Code, unzip it, and then bundle it up as a branded DMG. You can adapt it to your needs.
https://github.com/ethomson/vscode_dmg
When you build this repository in the Visual Studio Team Services build process, you'll end up with a DMG that includes a branded Visual Studio Code experience: